1. Check equipment placement and workpiece clamping
Ensure the chamfering machine is positioned on a level surface. Adjust the lower support legs (not the upper ones) to stabilise the equipment without wobble.
The workpiece must lie flush against the worktable. Verify all four corners are fully clamped to prevent overhang or misalignment.
2. Investigate fixture and concentricity issues
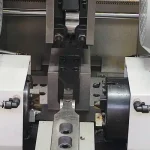
Worn fixtures or dimensional mismatches cause eccentricity, manifesting as uneven chamfer widths. Replace fixtures or adjust the chamfering die holder position to ensure concentricity with the cutting head.
For dual-head chamfering machines, inspect whether locking screws on ball screws, servo motor connecting shafts, and linear guides are loose.
3. Adjust feed stroke and parameters
CNC models: Verify parameter settings, particularly chamfer length and feed duration.
Pneumatic/hydraulic models: Ensure feed stroke reaches full extension with a 0.5-second pause before retraction. Adjust feed delay to stabilise length consistency.
4. Tool and Speed Optimisation
Tool wear or inappropriate speeds cause rough chamfer surfaces. Select sharp inserts for soft materials like aluminium; reduce speeds for hard materials.
Regularly inspect bearings and spindle bushings for wear to prevent tool vibration from mechanical looseness.
5. Troubleshooting Automated Equipment
Should automatic mode fail, verify that limit switches or magnetic switches have not shifted position. Confirm that sensing signals for actions such as ejector cylinder operation and clamping are functioning correctly.